This guide will help you get up and running quickly, whether you’re setting up your first device or expanding your system into a complete smart home ecosystem. In the following sections, you’ll find everything you need to know to start using ZyraX Home with confidence:
By the end of this guide, you’ll have a fully operational smart home setup and the knowledge to maintain, expand, and optimize your system.
The ZyraX Home changelog provides a concise overview of updates across the entire system, covering all ZyraX Home components. It highlights the most important changes so you can quickly understand what’s new, improved, or fixed.
For the full and detailed changelog of all the ZyraX Home components, please visit:
The installation process varies for each component. Refer to the specific installation instructions provided below. If you encounter any issues or need assistance, please open an issue on the specific GitHub repository.
After successfully completing the installation process, the system must be configured. On first launch, you will be prompted to create an account and set up your profile. Once this is done, you can configure the available modules. Modules can also be enabled or disabled at any time later.
To enable the VisualCrossing Weather API, you will need to create an API key here.
To enable the Telegram API for real-time messaging, please follow the instructions provided here.
Figure 1 includes a short instructional video to guide you through the process.
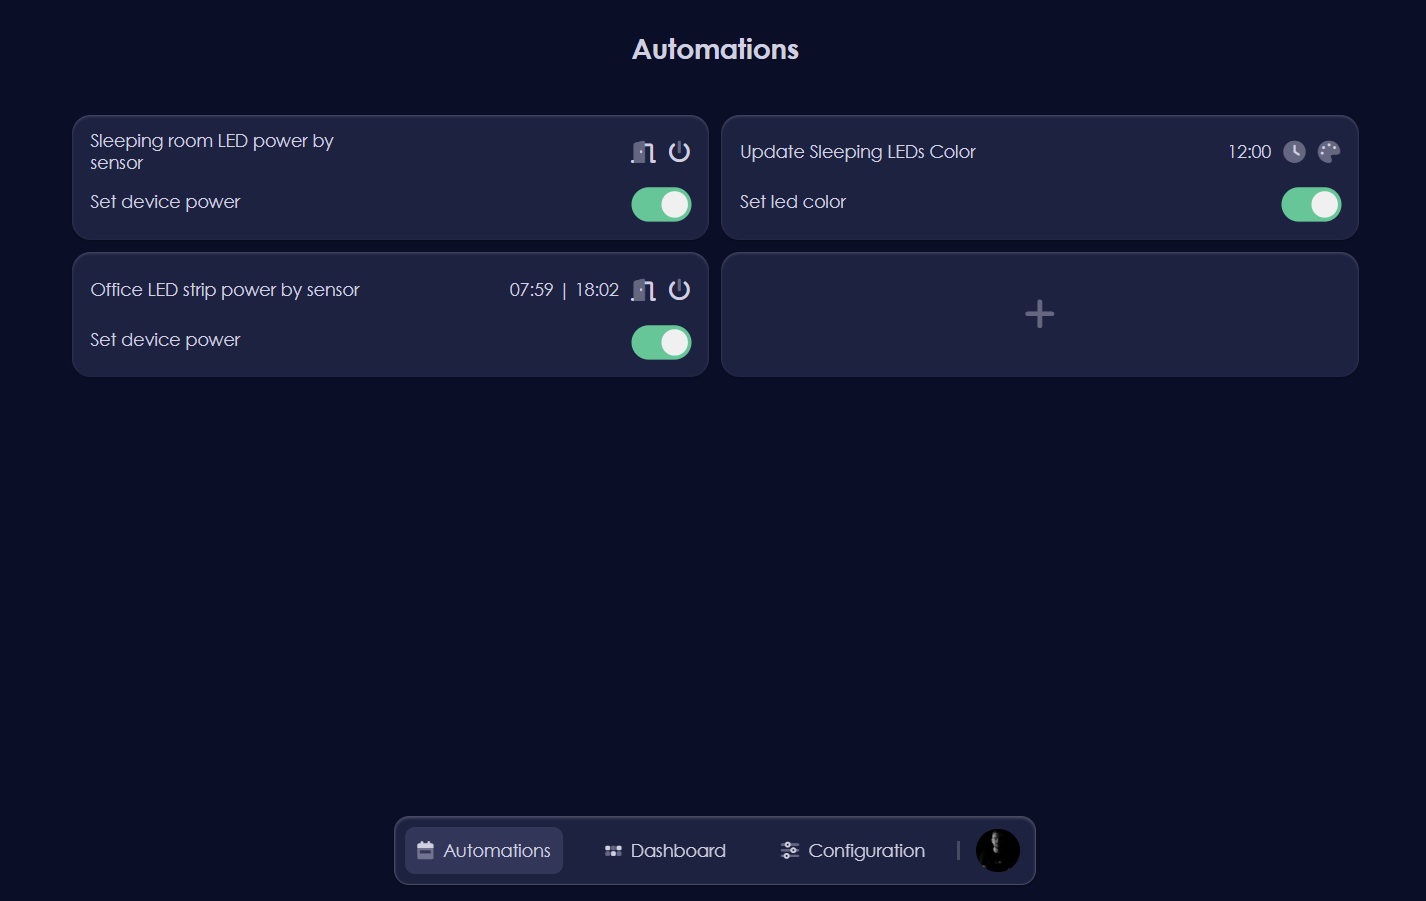
The UI is developed with ease of use and efficiency as spear points. The UI is web based and runs on the Main Controller. It can be used on desktop, tablet or mobile. The UI roughly consists of three main pages: Automations, Dashboard and Configuration.
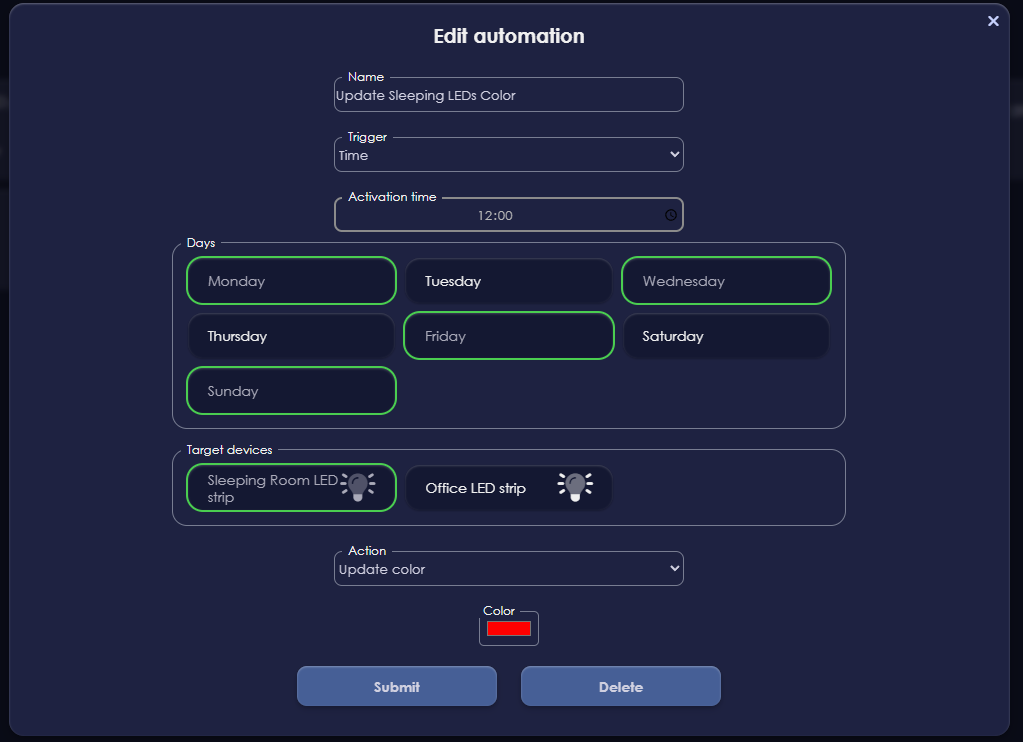
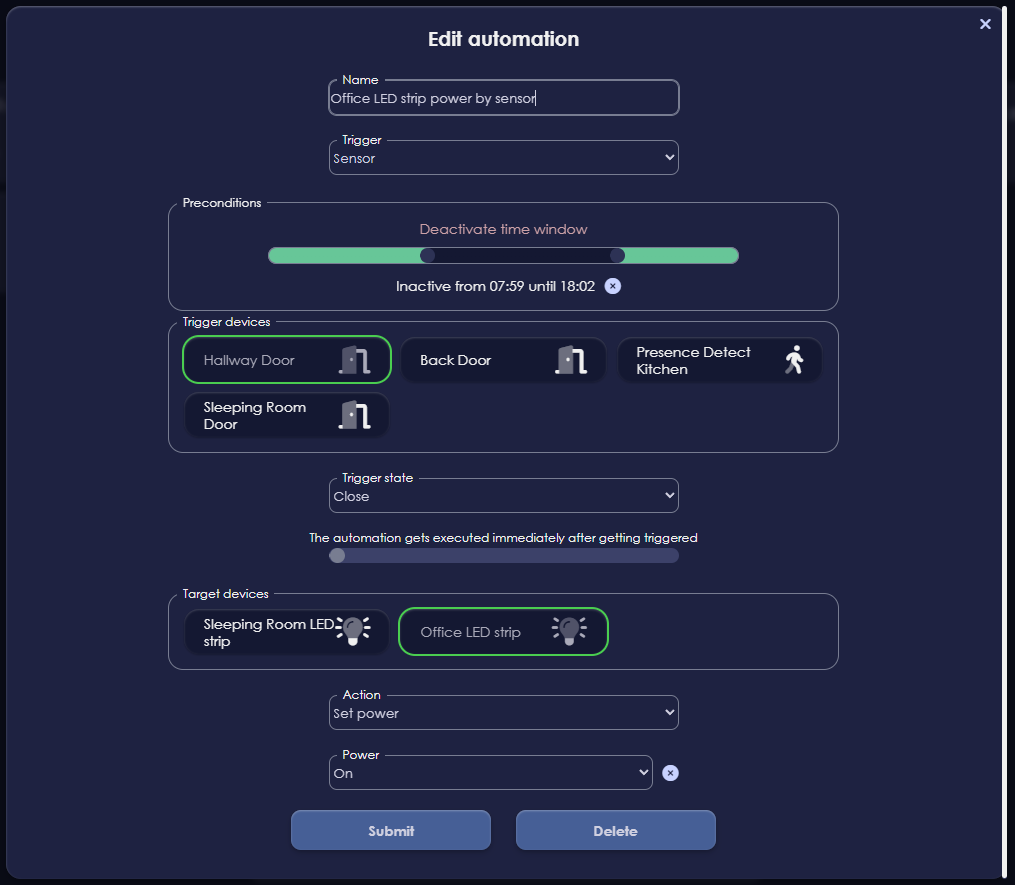
The Automations page shows an overview of the current automations. Click on an automation tile to edit it or enable/disable it with the toggle.

XX
XX
XX
XX